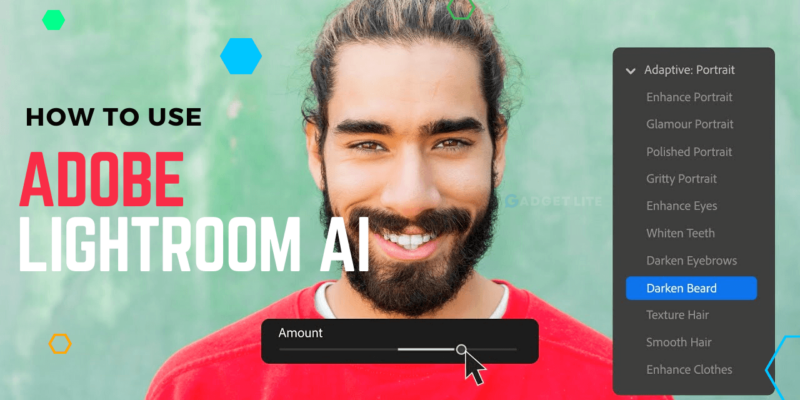
Adobe Lightroom has long been a popular choice among photographers for its powerful editing capabilities and seamless integration with the Adobe Creative Cloud ecosystem. In a world driven by the rapid advancements of Open AI, it comes as no surprise that Adobe, a pioneering software company, is also embracing the transformative power of artificial intelligence in the Adobe Software.
The software has improved significantly in terms of advanced artificial intelligence-powered editing tools created especially for portrait photography with the release of Adobe Lightroom AI Portraits.
In this article, we’ll look at how to use Adobe Lightroom AI Portraits features to its full potential and produce amazing portraits.
Table of Contents
Understanding AI Portraits:
AI Portraits is a cutting-edge tool in Adobe Lightroom that uses artificial intelligence algorithms to improve and retouch portraits automatically. It uses machine learning techniques to identify facial features, assess skin tones, and make targeted and exact modifications. Photographers may save time and produce professional-quality images with AI Portraits in just a few clicks.
Accessing AI Portraits:
To use the AI Portraits feature in Adobe Lightroom, you must have a Adobe Creative Cloud subscription and the most recent version of Lightroom installed on your device. Once everything is in place, launch Lightroom and go to the Developer section. Locate and select the “Edit” option from the top menu. To begin, select “AI Portraits” from the drop-down option.
Automatic Enhancements:
When you open the AI Portraits editing interface, Adobe Lightroom analyzes your portrait and makes preliminary edits based on its understanding of the image. Skin smoothing, eye and teeth whitening, and exposure adjustments are common additions. While these changes can be a good beginning point, they may not always correspond to your vision or the specific needs of your image. As a result, it’s critical to go through these alterations and fine-tune them as needed.
Manual Adjustments:
After applying the automated enhancements, you may fine-tune your portrait using the manual modification options. Adobe Lightroom AI Portraits has a number of options for fine-tuning individual image elements. For example, you can use the “Skin” tool to control the degree of skin smoothing or the “Eyes” tool to improve the brightness and clarity of your eyes. Experiment with these tools to obtain the look you want while remaining natural.
Customization and Presets:
You may also save and apply customized presets in Adobe Lightroom AI Portraits, allowing you to apply consistent adjustments across several portraits or achieve a specific aesthetic. Once you’ve tweaked an image to your taste, you may save those changes as a preset and apply them to other portrait with a single click. Additionally, Lightroom offers a variety of built-in presets that can serve as starting points or inspiration for your own creative editing.
Iterative Editing and Comparison:
One of the benefits of using Adobe Lightroom is the non-destructive editing method. This means you can make iterative changes to your photo and simply compare several versions to see which one looks the best. You can make virtual clones of your image, experiment with different editing techniques, and compare the results. This freedom allows you to try new things and make educated conclusions about your final edit.
Exporting and Sharing:
After you’ve finished editing with Adobe Lightroom AI Portraits, it’s time to export and share your work. Lightroom offers a variety of export choices, including the ability to select the desired file format, resolution, and quality settings. Whether you intend to share your photographs online or print them, make sure you choose the right settings for each platform or medium. Lightroom’s export function makes it easy to prepare your images for web galleries, social media, or printing services.
How to Use the Masking Feature in Adobe Lightroom AI Portraits
Adobe Lightroom AI pictures has a variety of powerful editing tools that you can use to improve and fix your pictures. The masking tool is an important one that can greatly improve your editing skills. Masking lets you make changes to only certain parts of your picture. This gives you more control over the editing process. In this piece, we’ll look at how to use Adobe Lightroom AI Portraits’ masking feature well.
The New automatic masking categories allow users to easily darken the subject parts or enhance the texture of clothing.
Step–1. To use masks, go to the right side of the screen and click on the tools for making changes. The masking function is shown by a brush icon and is called “Masking” or “Brush.” If you click on this button, the masking tool will be turned on.
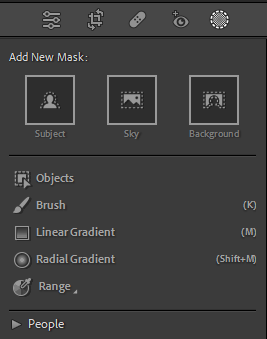
Step–2. Before you start masking, change the size and feathering of the brush to fit the places you want to work on. The width of the brush strokes is based on the size of the brush. By making the feathering bigger, the transitions between masked and unmasked parts will be smoother.
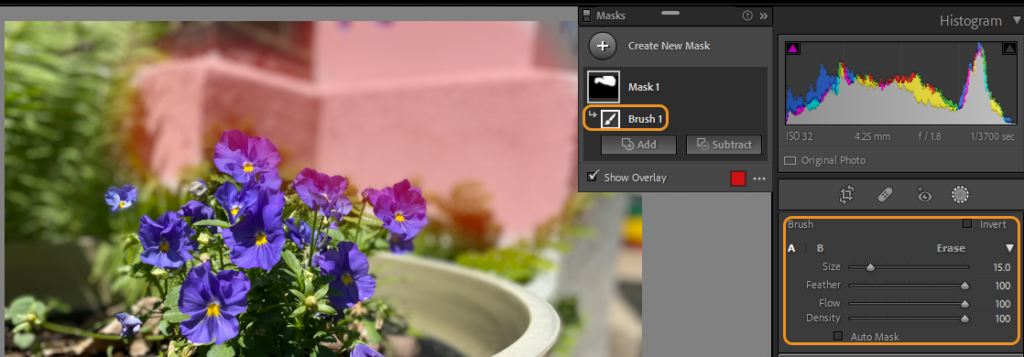
Step–3. With the masking tool activated and begin applying masks over the parts of the image you want to change. To make a mask, click and drag the brush over the area you want to cover. You will see that a colored overlay, normally red, shows you where the mask is. If you make a mistake or want to get rid of a mask, just switch the brush to “Eraser” mode and brush over the area you want to get rid of. This lets you control your mask with great precision.
Step–4. Sometimes, you may need to tweak your masks to make adjustments that are more exact. There are several ways to improve masks in Adobe Lightroom AI Portraits. One of these options is the “Auto Mask” feature, which automatically finds edges and stops the brush from moving into them. You can also use the “Refine Edge” or “Depth Range” tool to make sure that the shift between masked and unmasked areas is smooth.
- Adjust the Depth Range slider to define the endpoints of the selected depth range.
- Click+drag an area on the photo you want to adjust. It is recommended to choose a smaller area using the Depth Range Selector tool to narrow down on a specific depth range.

Step–5. Once you’ve made masks, it’s time to make changes to the places that have masks. Adobe Lightroom AI Portraits has a variety of adjustment tools, such as exposure, saturation, clarity, and more. Choose the editing brush you want to use and change its settings to your liking. Then, use a brush to make the adjustment only to the area that was masked.
Here are some other features of Masking tool in Adobe Lightroom AI
- In addition to the brush tool, Adobe Lightroom AI also provides graduated and radial filters for more complex masking needs.
- To better visualize your masks, Adobe Lightroom AI offers options to display mask overlays. You can choose to view the mask overlay as a colored mask, a black and white mask, or hide it altogether. This helps you assess the accuracy of your masks and make adjustments as needed.
- In addition to the masking function, Adobe Lightroom AI Portraits offers local adjustment tools such as the Healing Brush and the Clone Stamp.
- You can learn more in depth about Adobe masking tool here.
Adobe Lightroom AI Portraits is a potent tool that streamlines the editing process for portrait photographers. By utilizing sophisticated artificial intelligence algorithms and the masking feature, photographers have greater control over their edits, enabling them to make precise adjustments to specific regions of the image.

